How do I make an LTI 1.1 tool available to site owners?
Note: Configuration of an external tool requires information unique to the external solution being integrated. In addition, integration with a solution from a third-party vendor may require an account with that vendor. Be sure to confirm all necessary information for an external solution before configuration.
Go to External Tools.

Select External Tools from the Tool Menu in the Administration Workspace.
View Installed Tools.
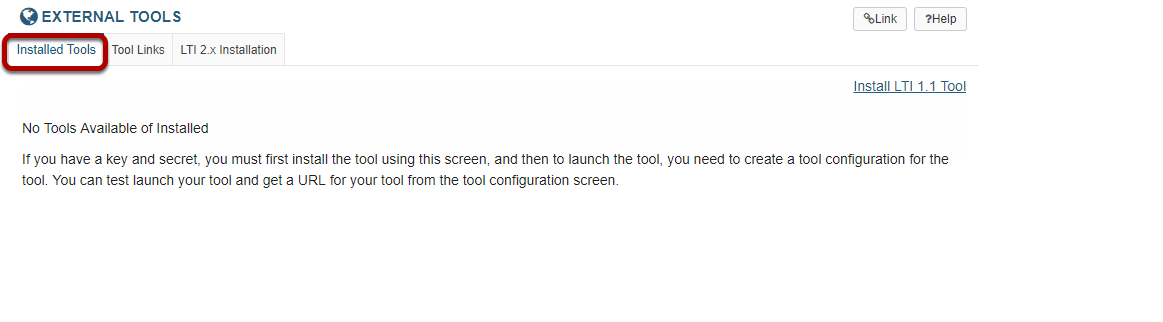
Click Installed Tools. If any external tools have been configured and made available in your instance, you'll see them listed.
Install LTI 1.1 tool.

Click Install LTI 1.1 Tool. The External Tool page displays.
Configure LTI tool
On the External Tool page, select settings and provide information as appropriate.
Site ID

Enter the appropriate site ID in the Site Id field if you want the external tool to be available ONLY in that site. If you want the external tool to be available in all sites, be sure to leave this field blank.
Name/description

- Enter text in the Tool Title field. When users access the tool in a site, this text displays at the top of the frame. (Choose Allow to let site owners edit this information.)
- (Optional) Select a custom icon from the drop-down menu.
- Enter text in the Button Text field. When users access the tool in a site, they'll see this text in the Tool Menu. (Choose Allow to let site owners edit this information.)
- Enter text in the Description field. This description will display to site owners when they select the tool via Site Info.
Status/visibility

- For tool status, select Enabled or Disabled. Enabled means that it is available for use in the system. Disabled means it is not available for use.
- For tool visibility, select Visible or Stealthed. Visible means that site owners can select it from Site Info > Manage Tools to add it to a site. Stealthed means that it does not appear in Site Info > Manage Tools and only admin users can add it to a site.
Launch settings

Note: The following settings are unique to each external solution. If the solution being integrated is from a third-party vendor, the vendor typically provides this information.
- Enter the URL in the Launch URL* field.
- Enter the LTI key in the Launch Key* field.
- Enter the LTI secret in the Launch Secret* field.
(Optional) Select the Allow radio button for any of these items to let site owners edit this information.
Frame height

To specify a height for the tool frame in a site, enter a value (in pixels) in the Frame Height field. Click Allow to let site owners edit this value.
Configuration dialog

To specify a height for the tool frame in a site, enter a value (in pixels) in the Frame Height field. Click Allow to let site owners edit this value.
Privacy settings/services

Determine the site information you want provided to the external solution, and whether the solution will return grades for Gradebook integration. Select settings as appropriate.
Content Item Selection launches.

Select the ways in which you would like this tool to be able to launch within a site.
Popup/debug

Choose how the external solution displays when it launches.
- Click Never launch in Popup if you want it to display in a frame within the site.
- Click Always launch in Popup if you want it to display in a separate popup window or new browser tab/window.
Click Allow popup to be changed to let site owners edit this setting.
Choose whether debug data will display to site owners when the external solution launches. Click Allow debug mode to be changed to let site owners edit this setting.
Custom parameters

Provide additional parameters in the Custom Parameters field, as appropriate. A parameter should be in the following format:
key=value
Be sure to list each parameter on a separate line. Click Allow additional custom parameters to let site owners enter more parameters.
Splash screen

Enter text in the Splash Screen field, as appropriate. This text will display to all users before the external tool launches.
Save your work
Click the Save button. You'll see the external tool listed with other external tools available in the system.